
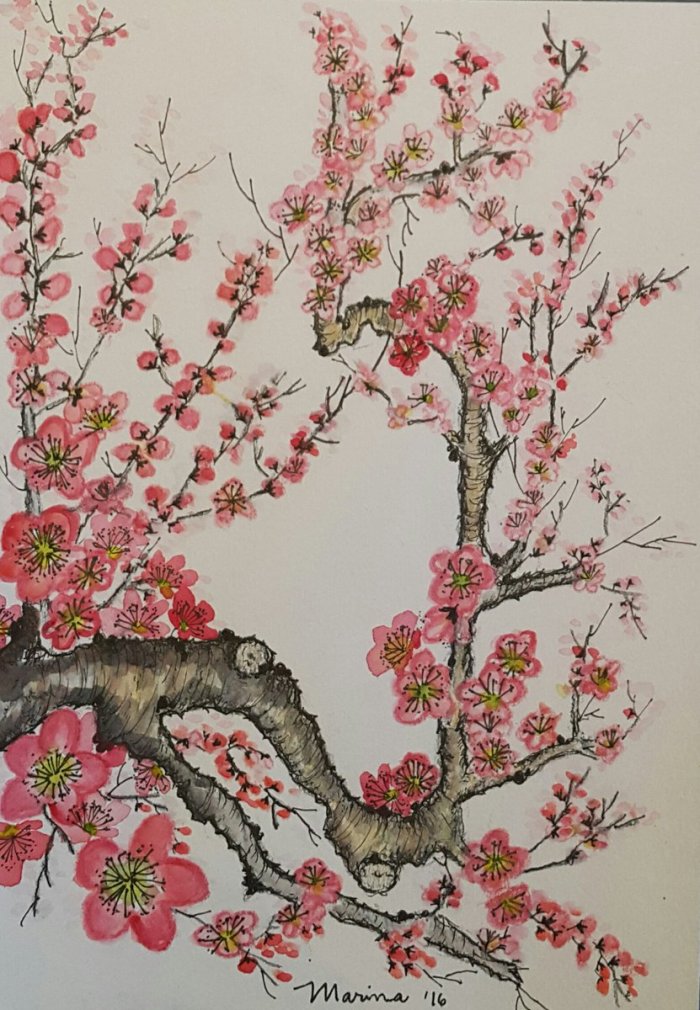
20 cm x 15.5 cm; watercolor on water-colour paper (140 lb; A5)
Blog Post 15
I painted Plum Blossoms on my way to Rome, Italy in October 2016–while waiting for boarding time in two airports and while aboard two airplanes. This is my only plum blossom painting done with a Kuretake transparent watercolour set; i. e., the usual watercolour tin packet containing 14 colours, a 0.3 technical pen and a medium-size water brush. It’s so compact, measuring only 16 cm x 17 cm–so perfect for travelers.
I entertain myself and lose track of time whenever I paint plum blossoms. Most often, I keep imagining its bunches of flowers and buds. Then, I keep extending branches to all directions– just to paint more flowers and buds!
I still remember: I missed my first chance to see plum blossoms in Washington, USA in 1970. But–45 years later, on September 2015, I was lucky to see thick plum blooms during a spring New Zealand vacation with my family.
By the way, before I saw plum blossoms up-close, I have already memorised how to paint them. Reason: Painting plum blossom was a required painting subject in a basic Chinese brush painting workshop which I joined on January 2013. In fact, the entire 10-Saturday workshop (at 3 hours/session) was about the Four Gentlemen (i. e., plum blossom, Chinese orchid, chrysanthemum, and bamboo). So roughly, about 2-3 Saturdays (or at least 6-7 hours) were focused on each gentleman. My discovery then: The easiest brush strokes to learn were those for painting plum blossoms. And the most difficult brush strokes to learn? Those for painting bamboos! And that’s the background story why painting plum blossoms has been my favourite pastime.
Have you painted plum blossoms? Here’s the classic sequence of painting a flowering branch: big branches (in stag horn pattern); flowers (facing all directions, lined or unlined); buds; and sepals of buds, half-opened flowers, or fully-flowers facing directions which show their undersides.
After you’ve finished painting your flowering branch of plum blossoms, you can paint a couple of snuggling birds perched on one of the plum branches They can enhance the loveliness of thick plum blossoms.
Here are some things I learned in painting plum blossoms which you can share with others, too.
-To paint the branches:
- Load a large stiff brush with dark ink. With quick strokes, paint old, bent, gnarled, and weather-beaten branches in a stag horn branching pattern. Use umber to make the branches rounded.
- Leave spaces as you paint the branches going to all directions. These spaces are reserved for painting bunches of flowers or for painting a couple of perched birds.
- Paint plum branches growing to all directions but most should end pointing upward.
- Later, add ‘mosses’ (black dots) on the branches to make them look aged.
- Use 0.5 technical pen to outline and emphasize the shape of the big branches.
- Use 0.3 and 0.1 technical pens to draw the young, terminal branches.
-To paint the flowers:
- There are two styles in painting flowers: lined or unlined.
- Colors of plum blossoms range from white, lightest pink, and darkest pink (fuchsia).
- To paint light and dark pink plum blossoms, load a medium-sized soft brush with white poster colour, then dip its tip into flower red.
- Paint big flowers on the foreground and small ones in the background.
- To make pink flowers: Load a large/medium sized brush with two colors: white poster colour (in the belly) and flower red (at the tip).
- Paint 5 equal sized and equally spaced petals. Paint bunches of flowers facing all directions. Reserve the very thin, young terminal branches for painting buds.
- While petals are still damp, load a medium soft brush with light green, and then dip its tip into rattan yellow. Dab each flower centre with these colours, letting them run and blend with the colours of the petals. Dry.
- Add numerous stamens per flower using a thin, long brush. Use dark ink /rouge to paint filaments; or, yellow/rouge to paint anthers. Just be sure to make the stamens stand out among the pink petals.
-To paint the buds:
- Load a small soft brush with white poster colour. Then dip its tip into flower red.
- Paint delicate buds by lightly dabbing the brush on the water-colour paper. Be sure to press the brush a bit to paint two-toned buds.Dry
- Load a long thin brush with rouge to lightly dab 3 sepals below each bud.
- Only buds should be painted on the terminal branches.
- Buds grow alternately on the sides of terminal branches.
- No bud grows on tips of terminal branches.
-Add-on birds:
- Paint a couple of snuggling birds, using colours which can complement the pink plum blossoms.
Other plum blossoms I painted using traditional Chinese painting materials (i. e., Taiwan solid watercolours, animal hair brushes, and Taiwan rice paper) are shown below:


Pink Burst Bathed in Silvery Moon


Plums Promises-1 Cold Blooms
At this point, after having shared a long list of tips with you, have I encouraged you enough to prepare your brushes, paints, and watercolour paper for painting thick plum blossoms? All set? Paint and be surprised at what you can do.
![]()

If I can only have a little of your diligence and dedication!
LikeLike
Hi Beth! Thanks or dropping by 🙂 Let’s form a Saturday group so we’ll keep exchanging painting tips. Ioni and Yen have said ‘yes!’ to that idea too. Let’s keep painting!
LikeLike